Wednesday, May 14, 2014

In Tandem: Making Progress on Two Sweaters

Lately, I have had the urge to make progress on both sweaters that I have been making since each of them was at a point where I needed to sit down and concentrate on the shaping. Kearsarge had been sitting in a corner patiently for a long time, needing some focus on the neckline shaping. I spent a bit of time with him and am pleased to now have the back and front completed.


This pattern is written so that you must knit a different pattern on the sleeves than on the body. I am a bit sad to be finished with the wonderful basketweave pattern (one of my favorite to knit because it is interesting yet simple and easy to get into a flow while knitting it). The sleeves are knitted in mistake rib patterning, so they will be great for carry-along knitting. I hope to be able to put this sweater to bed soon.

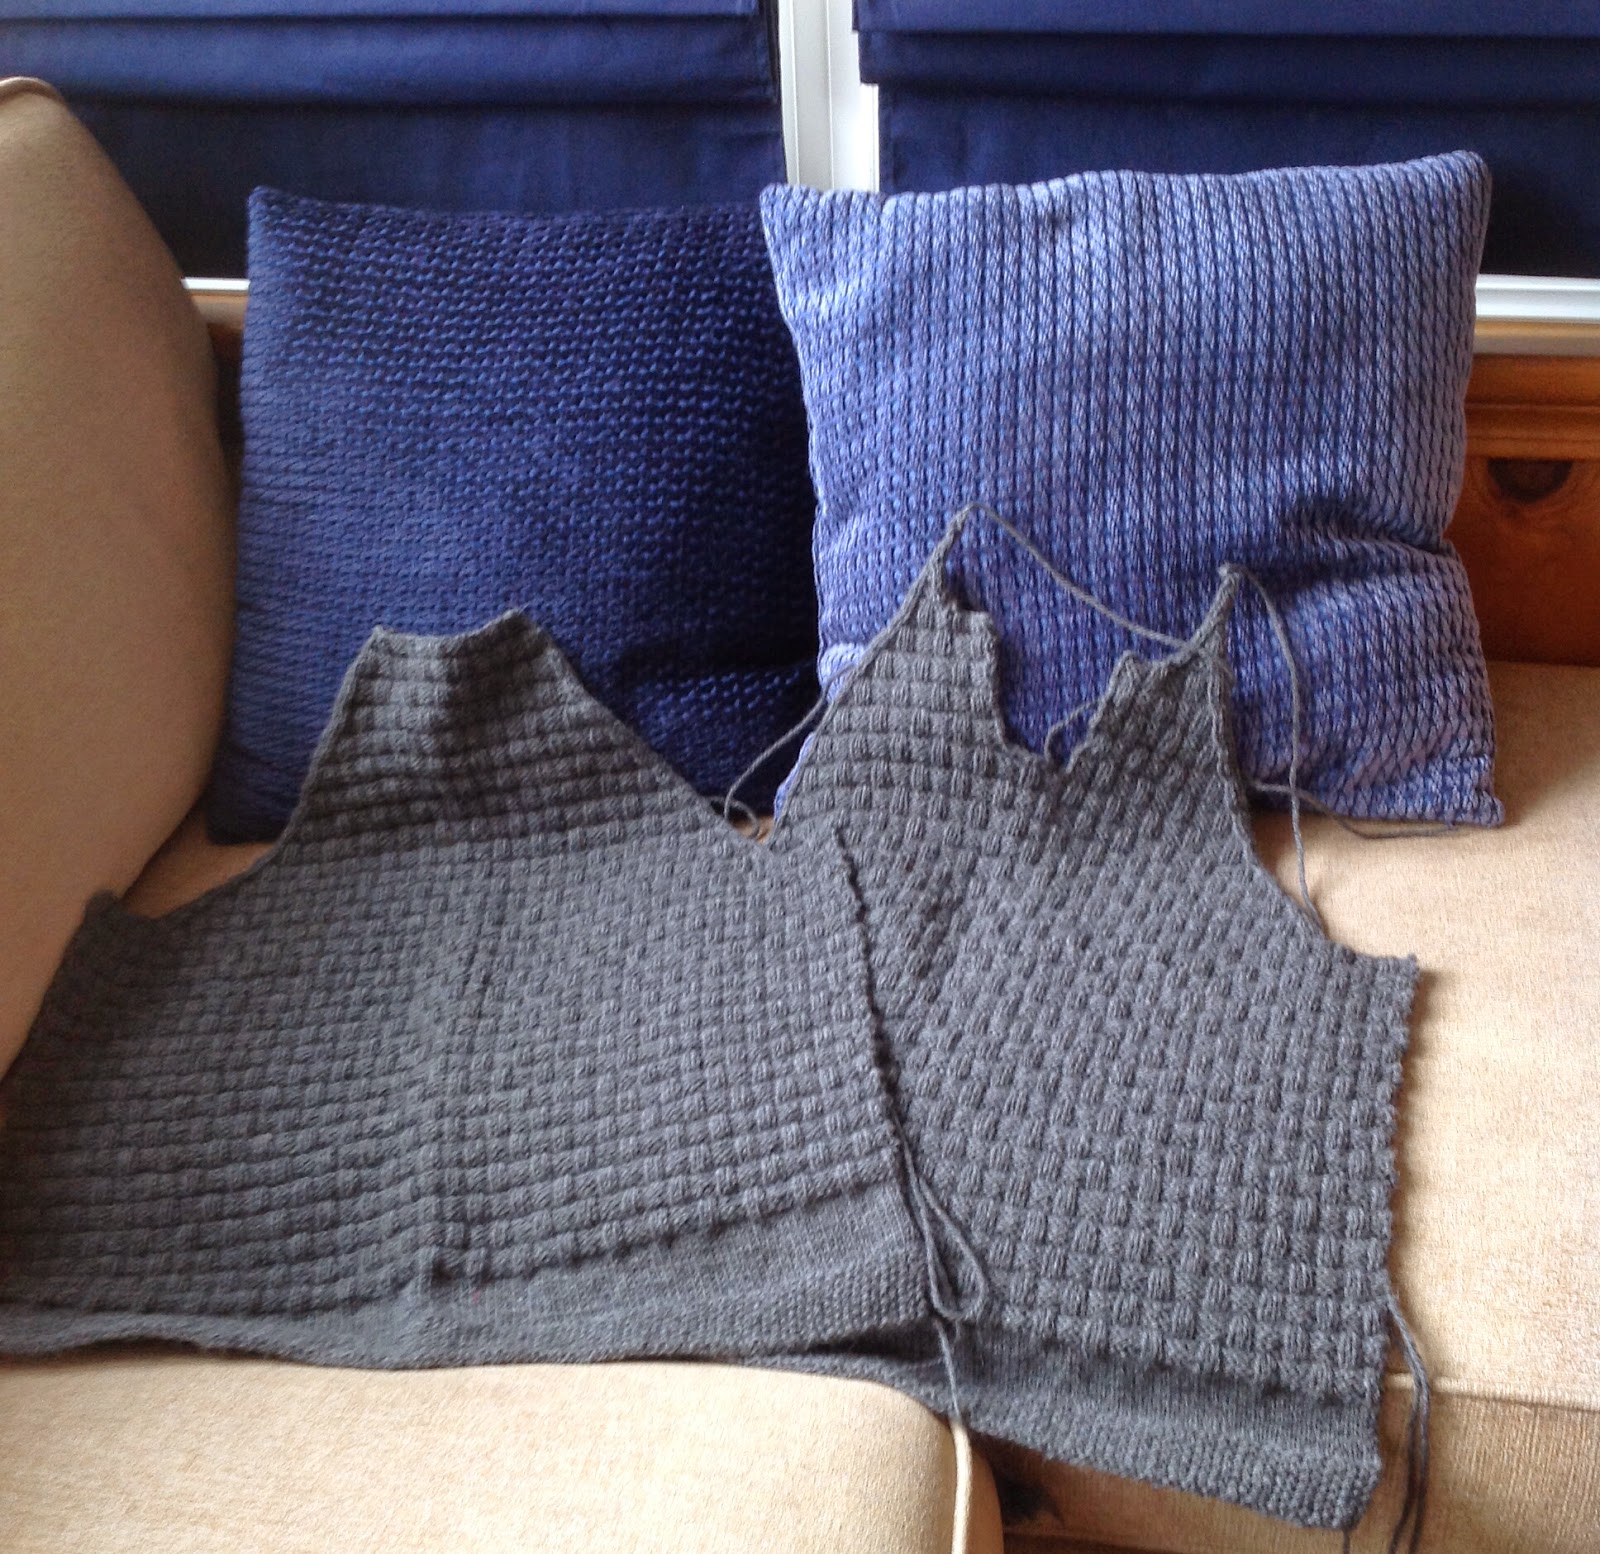
The sweater that I have been designing had also gotten to the point where the second front needed some concentration while shaping the neckline. Here are the two fronts and the back completed.


I am really liking the way this sweater is coming together, although, I am still a bit concerned about how narrow the two fronts look. I had this same fear when I knitted Lisa Lloyd's Ravensong, which is also a fitted sweater, but it turned out fine once blocked. I just keep telling myself to trust my blocked swatch since it shows how much the lace opens up, and it has the measurements upon which I am basing this design. Now, I am going to move on to making my calculations for the sleeves.

You might have noticed that both of the above sweaters are knitted in pieces. Some of you might be wondering why I don't knit them in the round, as knitting in the round has become so popular. I have knitted several sweater in the round over the years. I do enjoy that style of knitting at times for some of the following advantages it has over knitting flat:
  • You can try the sweater on as you go along if you knit it from the top down.
  • The knitting is continuous, so it is easy to get into a great flow.
  • Once the knitting is finished, you only have to sew in the ends -- no seaming!
For all of the above reasons, I usually knit a simple pullover in the round from the top down. One major disadvantage that I find with knitting something as large as an adult sweater in the round is that it gets heavy and cumbersome the bigger it gets. It also become difficult to carry around in a purse for knitting on the go. Lastly, it sometimes feels as if the knitting goes on forever since there aren't any clear stopping points when one moves onto to something new.

So given the advantages and keeping in mind the disadvantages of knitting sweaters in the round, I find that, overall, I enjoy knitting flat pieces a lot more. I also like the final results better. Some of the advantages of knitting flat pieces are the following:
  • The pieces are portable since they tend to be small or easy to roll up into a small piece for easy storage in a purse.
  • Once a piece is finished, you get to move onto something "new" since you are beginning a new piece with its own cast-on, shaping, etc. This makes it seem like the knitting goes by more quickly.
  • The seams seem to give the finished piece more stability, and they provide a great place to hide the yarn ends securely.
As for the seaming, it isn't my favorite part, I will admit. I like it for a brief amount of time when I first begin it, and it feels really cool to be putting together "puzzle pieces" in such an efficient manner. However, it loses its appeal fairly quickly for me, becoming something I just have to force myself to finish in several sittings. I can't do it all in one sitting since I am too slow for that, and I get back pains. However, once I reach the home stretch and finish, there is no better sense of accomplishment!

Monday, May 5, 2014

Just Because It Makes Me Happy!

I don't have a lot of new knitting/crochet to share today since I had a busy (wonderful) weekend attending my cousin's wedding. I got to knit a bit more on my cardigan, but there isn't much more to show. However, I wanted to share this picture with you just because it made me happy. 

I took it on a glorious Spring day last week when the sun was shining through the window for one of the first times in what seems like forever. It hit upon my crochet in a way that made me smile.


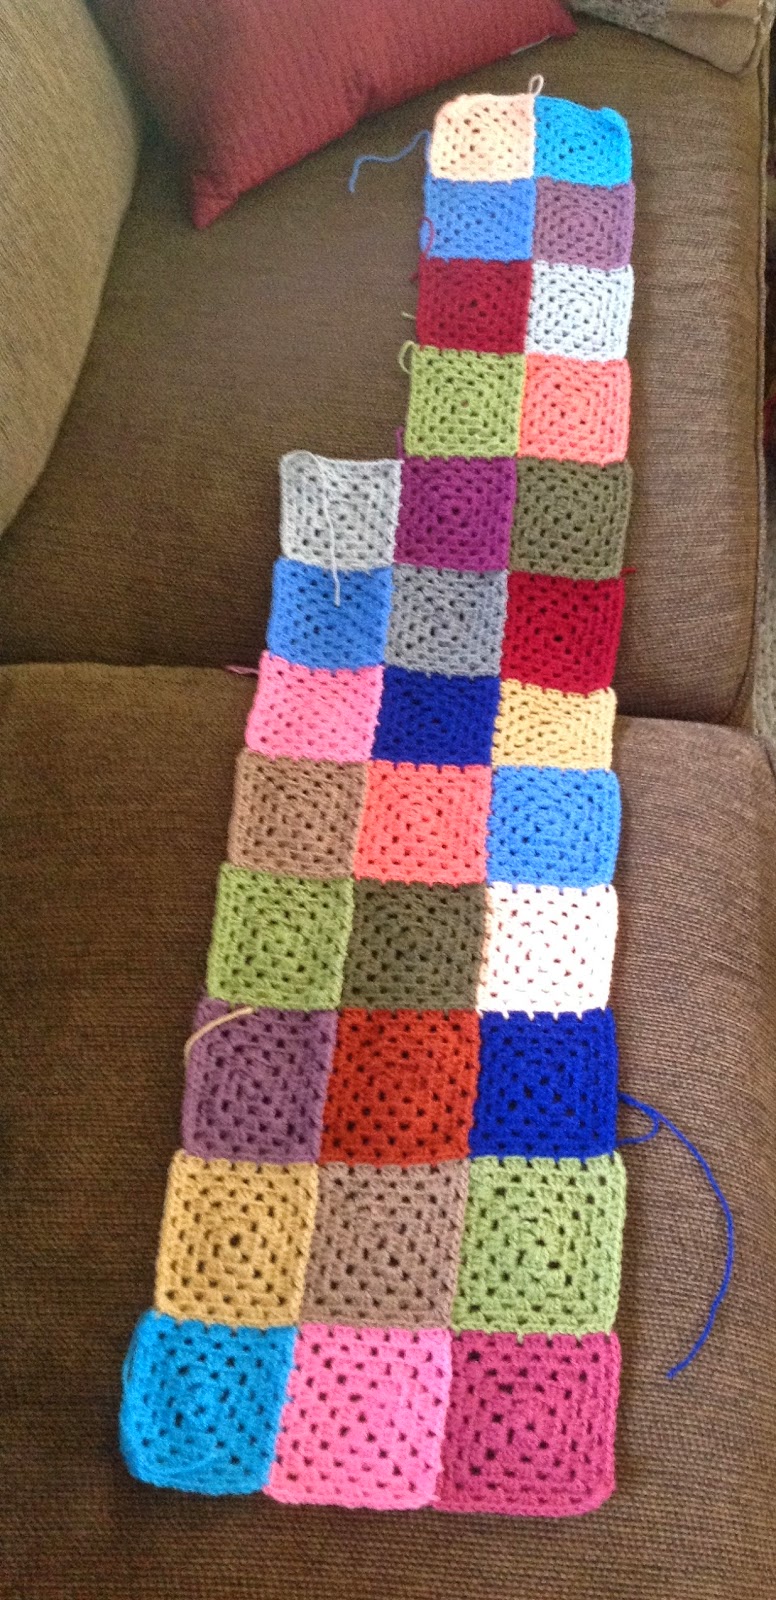
Looking forward to the small patch of fabric that is now the Granny Patchwork Blanket to grow enough to join its big sis, Granny Stripes, on the couch. Hopefully that will happen in time for the cold weather when it appears again come Fall. 

On a side note, I had a lot of fun reminiscing with my aunt about how we both learned to crochet with my Great Grandmother (her grandmother) teaching us as children. I hadn't realized that she had recently begun crocheting baby blankets again -- one for her new grandchild. It was a lot of fun learning that we shared this connection even though we live so far apart.

Friday, May 2, 2014

Product vs Process?

A discussion that regularly takes place in the crafting world is whether a crafter is a product or process knitter/crocheter/spinner, etc. My answer to that question has always been a resounding statement of "I am all about the process; the end product is just a bonus." During all of my years of knitting/crocheting/spinning, I have rarely had less than three projects going at a time (at least not since the very early days). I almost always finish these projects, but it often takes me months or sometimes years to do so. No sock has ever been left without its mate, but it may have waited quite awhile to be paired before being put in the sock drawer. Blankets have lain folded in a basket for years before becoming big enough to cover anyone properly. Sweaters have been tucked into corners, with only a sleeve to go or a button band to be picked up, for a very long time before something in me rises up and forces me to sit down and finish them! None of this ever bothers me, though. I knit because I love knitting! The garments/items are an added bonus, but they are not the end in themselves.

That is until recently. What changed? I took to designing my own sweater. Now I desperately want to finish it so I can see how well it all works out.  The process has become the designing and the only way to find out if I like what I am doing is to see a finished object, unlike when I am following a pattern, and I already know how it will look when finished. So I have dedicated myself to mostly working on the cardigan I am designing (with a little crocheting of granny squares to mix things up at times) until it is finished. With this new mentality, I am making swift progress given my limited time to knit. 


I will let you in on a little secret. My hurry to finish isn't only about seeing what it will look like put together, but it is also about wanting to see if it is big enough once blocked and put together. I keep having a nagging concern that the right front looks awfully narrow. My blocked swatch measurements tell another story, so hopefully, that story provides the happy ending for which I am hoping!  My plan is to block all of the piece before seaming. That way, I can make corrections if the pieces are completely off. It will be a painful process if that happens because it will mean a lot of reknitting, but it just might need to be done.

Friday, April 25, 2014

Steady Progress

The end of the school year always means a lot of grading for a college professor, so as you can imagine, yarn work has had to take a bit of a back seat lately. However, I have made steady progress on a couple of items I have introduced here before.

I am finding that the Granny Patchwork Blanket is very nice to pick up on evenings when I am tired and unable to think too deeply about fiber arts. Each square is made in exactly the same manner. I have also decided to plan each row of squares in advance (as Lucy on Attic24 did) since it makes the project more portable. I am really started to get excited about how well the colors are coming together. Lucy talks about "soul" colors as I have mentioned before, and these are definitely mine. They make me feel warm and fuzzy inside when I see them.


The picture below shows all of the squares.


On the knitting front, I have mostly been working on the sweater I am designing for myself. This process is so much fun, and I wonder why I waited so long to try it! If any of you are considering designing your own garment, just jump into it. Really, what is the worst that can happen; it is just yarn. Here is the back piece:


As you can probably tell, this will definitely need to be blocked, and once it is, the lace will open up quite a bit in the central motif. One element of this design that I am so pleased by is that I was able to get the honeycomb stitch into it in a way that did not simply mimic the traditional Aran look. I wanted a touch of Aran but with the twist of a lace motif that resembles cabling. 

I have started the front pieces and hope to keep chugging along on this sweater until it is finished. Usually, I tend to knit many different things at once without sticking to any one project for any length of time. I guess you would call me a process knitter since I am never too concerned about how long it takes me to finish something unless I am knitting a gift or test knitting for a designer. However, this time, I really want to finish this project as soon as I can just to see how it all turns out. I also need to calm those negative voices inside of me that keep telling me "it might be too small" or "the color isn't going to look right on you." I know that once it is finished and blocked, everything will work out. Once it is completed, I will write a longer post on my design process and about all of the helpful resources I used to make it happen. It really has been a simple process and one that I am enjoying.


Thursday, April 17, 2014

Busy Week - Not a lot of New Stitching Going On!

This has been an incredibly busy week for me for some reason. I always talk about how we have ebbs and flows in life and that when I have the ebbs, I try to take advantage of them by indulging in my crafts as much as possible. Unfortunately, this was a week where it felt like an entire sea flowed towards me, both at work and at home. I am steadily making my way to shore and hope to get back to some quality crafting time next week. I also hope to have something fun to show you then. 

Until then, I will just provide a little tease of something I have been working on quietly lately. I am trying to design my own sweater. Only once before (in 20 years of knitting) have I ever knit a sweater without a pattern, and it was a basic high-waisted rib, fitted cardigan for my daughter who was a pre-teen at the time. It was pretty simple, but I was pleased to accomplish the decision-making process and the math involved in the shaping at the time. This time, I am spicing things up a bit by trying another cardigan (this time for me) but by adding a motif with various stitch patterns to it. I have the back almost completed and am having a really good time working my way through this process. Here is a picture of the swatch I made to test out my ideas. 


Is anyone surprised that the first motif I designed myself contains the honeycomb stitch? :)  In case you were wondering, the yarn is Cascade 220.

Friday, April 11, 2014

Join As You Go (JAYG) - A Miracle Technique for Crocheting Granny Squares

I can't express strongly enough how enamored I am with the JAYG (join as you go) technique that I recently learned to use while working granny squares. As I mentioned on this blog in another post, I have known about this technique's existence for a little while, but I had never tried it out before. I hadn't seen any directions for it and hadn't taken the time to search for them, but then I came across Attic24 (my go-to blog for anything crochet-related) and saw Lucy's wonderful tutorial for the technique. Since that time, I have also watched a you-tube video about it and have read Edie Echman's book, Connecting the Shapes Crochet Motifs. This technique has really changed everything for me when it comes to crochet because I am now really enjoying making granny squares, knowing that I will not face an endless amount of joining when I finish piles of squares.

Here is a brief explanation of how I am joining my squares as I go (note that my method is slightly different from the explanation in the link to the first tutorial above but is the same as the method used by Lucy in the second tutorial; both get very similar results):

  • For the first row, I completed a five-round granny square and then chose a coordinating color for my second square.
  • I completed four rounds of the second square, and then I completed the first edge of the the fifth round, while only completing the first three-dc cluster of the corner. (I begin the rounds by chaining 3 after I slip stitch into the top of the chain 3 from the round below. This makes my first dc. I then dc directly in to the space at the right edge of the corner, which does slightly twist the stitch. Finally, I complete the 3 dc cluster, which is only half of the corner. Then when I come around the to that corner again, I complete it with 3 dc, chain 2, and a slip-stitch join to the original chain 3 I made to begin the round. The slight twist of the first chain 3 stitch does not show at all once the round is completed.)
  • I, then, slip stitched into the corner of the first square I had completed, connecting the top left corner of the second square to the top right corner of the first square.
  • After I slip stitched the two corners together, I then completed my second 3 dc cluster to complete the corner. 
  • From this point on, the JAYG technique continues with slip stitches into spaces on the completed square to connect the sides of the two squares and 3 dc clusters into spaces on the square being worked to create the last round of that square.
  • When I got to the second row, I began the task of not only joining the adjacent sides of squares, but also of joining the bottoms of the squares in the row being worked to the tops of the squares in the row below. This means that you must slip stitch in two places at the corners, once into the corner of the square that is adjacent to the square upon which you are working and once into the corner of the square below the one upon which you are working. After these two slip stitches are completed, you begin to make the 3 dc clusters into the bottom edge of the square upon which you are working, slip stitching into the spaces of the square below the one upon which you are working as you go along.
Here is what it all looks like put together.


This next photo illustrates a square in progress that will be attached soon.


This photo illustrates the slip-stitch joins, circled in red, and gives an idea of placement. 


The most helpful tip I learned when studying this technique was to think of the slip stitches as the equivalent of the chain 2 that is done between the 3 dc clusters at the corners and the equivalent of the chain 1 (that is sometimes done) between 3 dc clusters along the sides. (I want to note here that I am not chaining between my 3 dc clusters along the sides in order to make my granny square more compact - a tip I learned from Lucy on Attic24).

As for choosing my colors as I join squares, I am currently flying by the seat of my pants and just choosing them as I go. I like this method since so much of my life is planned; I find it to be fun to have freedom in my crafting at times and to just try to go with the flow of my inspiration at the moment in choosing the colors. Since this is supposed to be a "patchwork" blanket, I have faith that this spontaneous method will work out in the long-run just as it did when I made the Granny Stripe Blanket. However, I reserve the right to change my mind after this second row if I find that I am not pleased with the effect. If that happens, I will follow Lucy's method of choosing colors a row at at time.

Please share your experiences with JAYG in the comments, or if you have another method of joining that really works for you, we would love to hear about it.

Friday, April 4, 2014

Adventures in Drop Spindling

I have been focusing mostly on knitting lately, working steadily on Kearsarge for my husband, designing my own knitted cardigan (which I will talk about here once it is complete), and completing another hat for someone we know who is enduring chemotherapy.


The hat is made with Cascade Sierra Quatro (a yarn that has recently been discontinued). I like to make these hats from cotton or a cotton/wool blend so that they are easy to care for and so that they can be worn indoors. I have heard from many cancer survivors that it is great to have a hat like this that can be worn around the house.

Even though I haven't had as much time to work on my drop spindling, I did do a little this week. I would like to talk about some of the resources I have been using to assist me in learning this new skill, just like I did in a recent post about Fair Isle.

This first set of pictures illustrates some yarn I made in my very early attempts to drop spindle. 


This yarn was spun from Malabrigo Nube fiber. As you can see, it is quite underspun and the yarn switches from very thick lightly spun yarn to overly twisted, thinner yarn. This is a classic look for yarn made by a brand-new spinner. I remember making yarn like this on my wheel at first, too. However, I have also come to the conclusion after reading some of the sources I will list below that beginning with Merino fiber wasn't the best choice. Here are some reasons:

  • Short Staple Length: Since Merino has a short staple length (which accounts for its softness), it seems to be harder for a newer spindler (or spinner) to manage the motions quickly enough to keep up with the short length of the fiber staple. This seems to be why I had so many underspun sections. 
  • Combed Top: The other problem I found with spinning this Merino is that the fiber came in a combed top preparation, which is typical for Merino. This means that all of the fiber had been combed so that every piece of fiber was parallel to every other piece of fiber. This makes for a very smooth preparation that makes it easier to spin a worsted yarn (not worsted weight, in this case worsted basically means smooth and shiny), but worsted spinning of combed top is a little trickier to get the hang of when you are new to spinning or spindling.
  • Fiber Presentation: The fiber was "put up" into a pretty package (the braids you see on the Malabrigo website), so everything became compressed. I did pre-draft the fiber to try to loosen it up a bit, but I think I needed to do more. Splitting it into many smaller sections would have helped, but I only split it a couple of times.


With all this being said, one of the amazing things about handspun fiber is that no matter how far from the mark it looks when you see the finished result after spinning, knitting it can always do wonders! I have yet to have spun a fiber where I wasn't amazed at how much better it looked once knitted up and blocked (and plying even helps it before knitting it does). Here is what the Malabrigo Nube looks like knitted into a swatch:


It looks like the type of yarn one could use to make a novelty hat or cowl. I might just try to duplicate these initial spinning efforts with a bit more accuracy to get enough yarn for a hat.

So during the process of extreme frustration I was feeling while trying to spin the Malabrigo on the drop spindle, I realized that the fiber might be an issue. At this point, I pulled out some Romney fiber that I had stored away to use on my wheel. Romney has a longer staple length and is considered a fiber with a medium staple length. It is often cited as good fiber for beginning spinners to use. I remembered this from when I had learned to spin on my wheel, so I decided to give it a try. I immediately had much more success. Here are some pictures of what it looked like on the Niddy Noddy and wound into a ball.


As you can see, I was able to spin a much finer yarn that was more consistent. Of course, I still have a ways to go, but I feel as if I am at least getting my spinning under some control. I plan to spin some more on the drop spindle and then create another ball, so I can ply to the two balls together to create a two-ply yarn. 

During this process of learning the drop spindle and making some progress towards improving, I have had several resources that I have been very helpful after a class at my LYS got me started!

Lastly, one of the most helpful techniques that I learned from the resources above (especially Pricilla Gibson-Roberts) is the importance of using the Park-and-Draft method to first learn the steps in the process of spindling before actually trying to spin with the drop spindle in mid-air. Once I got the hang of my drafting technique using Park-and-Draft, and I could see how the twist was entering the fiber, it was very easy to transition into true drop spindling. 

Does anyone have any experiences with learning to drop spindle to share or any tips to help those of us newbies who want to improve?

Happy spinning, spindling or knitting and crocheting if those are your fiber crafts of choice!