Showing posts with label crochet. Show all posts

Friday, March 23, 2018

I am back!

I have taken an incredibly long break from posting here over the last several years. My complete focus was on my teenagers as I followed them and guided them through their busy high school years. Now that I am about to be an empty nester, I thought it might be a good time to start my blog again.

My fiber passion has kicked into high gear again in the last several months with a lot of focus on crocheting blankets thanks to Lucy's wonderful designs over at Attic24. Finding her blog over five years ago re-ignited my passion for crocheting blankets (my first love as I was taught by my great-grandmother as a child). Here are a few of the blankets that I finished in recent years while away from the blog:

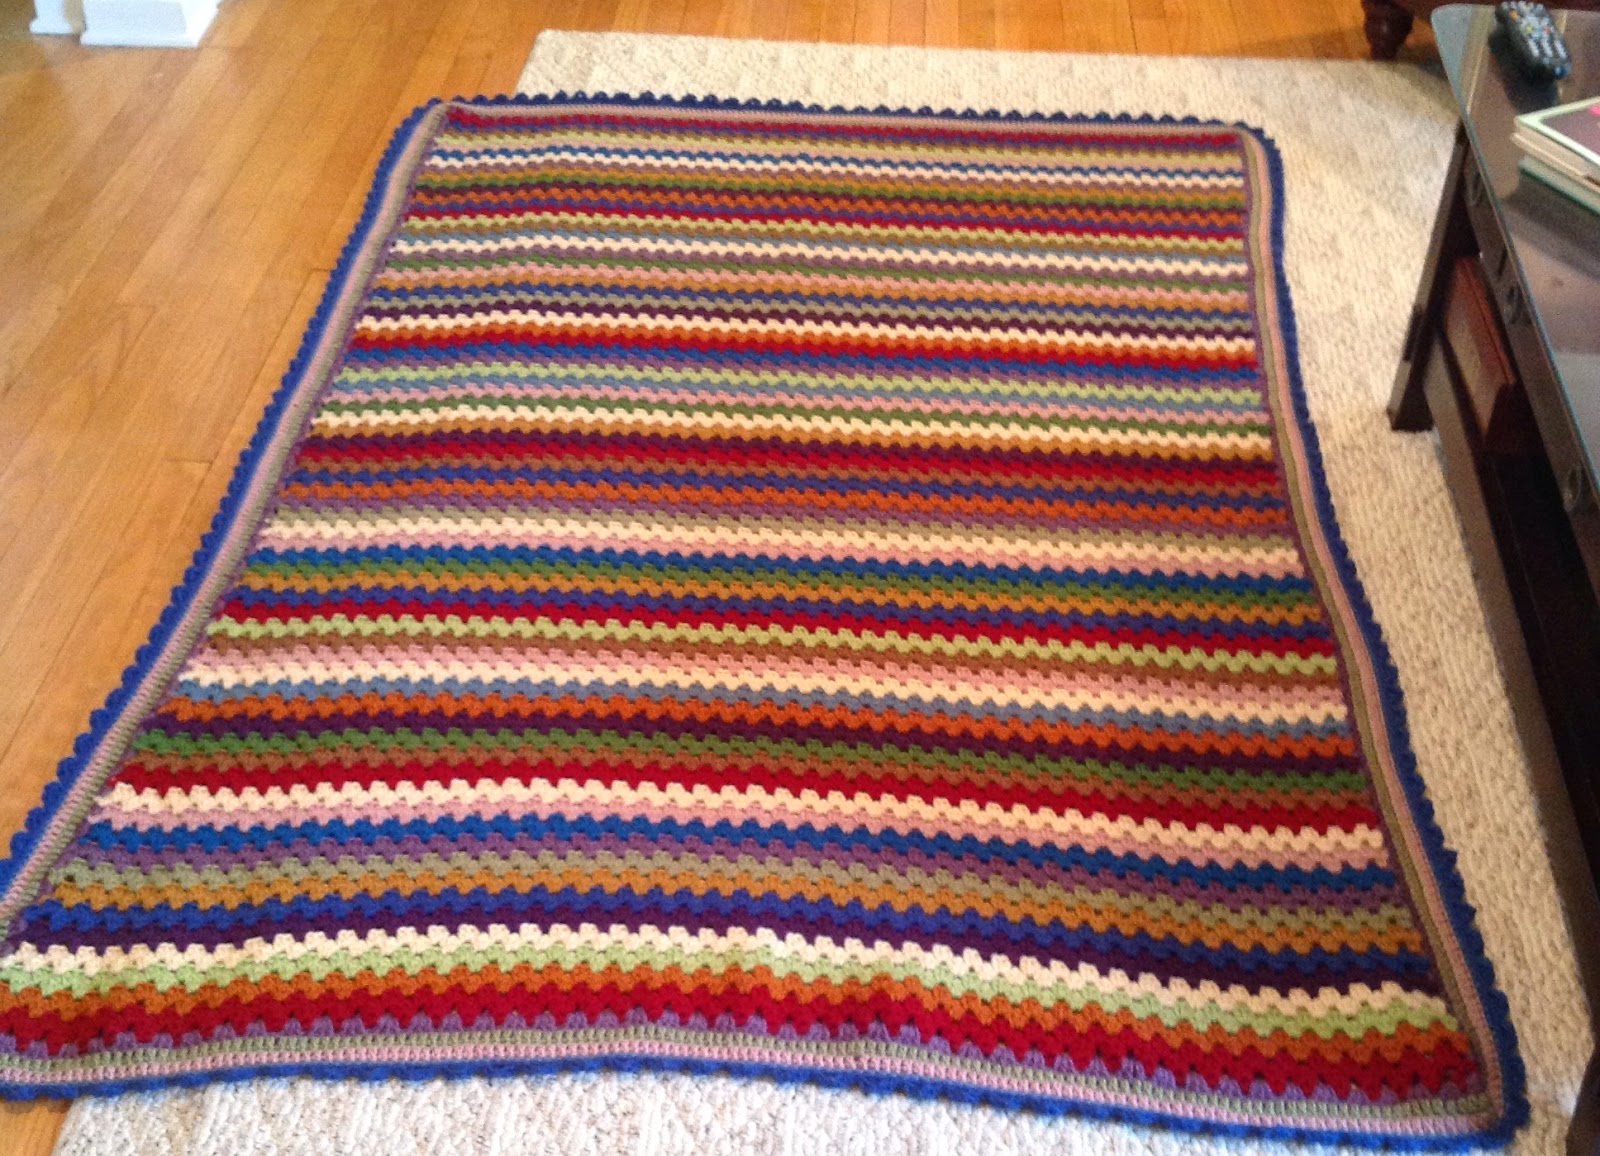
A Granny Stripe afghan for my daughter when she left for college over a year ago:


A Granny Patchwork Afghan modeled after one made by Lucy on Attic24:


This one sat for a year with a border that I was very unhappy about since I had forced myself to use yarn left over after completing the squares. The colors were not ideal, so I finally decided to order more yarn to create a border that I love! Here is a photo of the blanket with the old border:


As you can see, the older border emphasized the pink in the blanket too much when my original intent was to bring out the warmer tones and let the brighter squares pop here and there. The new border achieves this effect a lot better, is wider like Lucy's original version, and coordinates a lot better with my home's decor.

Lastly, I used left over yarn skeins from my original Granny Stripe, my daughter's Granny Stripe, and another baby blanket I had made awhile back to create this stash-busting Neat Ripple blanket:


I was so happy with the experience of making it and with the end product that I definitely see a lot more stash busting in my future (More on that in an upcoming post).

Currently, I am working on a Granny Stripe for my son who will be off to college in the Fall. He needs one just like his big sister! Here is the beginning of his afghan made in colors coordinated with his school colors and with colors approved for their marketing materials:


As you can see, I have a passion for making blankets. It is in the genes; my great grandmother, Mom Jo, was known for making an afghan for each one of her grandchildren and great grandchildren. She was from a very large Italian family! Here is a photo of the one she made for me that I use to this day:


I hope to match her blanket-making prowess. I am well on my way with the one I have recently made and several that I made in past years but never documented with photos, unfortunately. Happy blanket-making everyone. 

Monday, May 5, 2014

Just Because It Makes Me Happy!

I don't have a lot of new knitting/crochet to share today since I had a busy (wonderful) weekend attending my cousin's wedding. I got to knit a bit more on my cardigan, but there isn't much more to show. However, I wanted to share this picture with you just because it made me happy. 

I took it on a glorious Spring day last week when the sun was shining through the window for one of the first times in what seems like forever. It hit upon my crochet in a way that made me smile.


Looking forward to the small patch of fabric that is now the Granny Patchwork Blanket to grow enough to join its big sis, Granny Stripes, on the couch. Hopefully that will happen in time for the cold weather when it appears again come Fall. 

On a side note, I had a lot of fun reminiscing with my aunt about how we both learned to crochet with my Great Grandmother (her grandmother) teaching us as children. I hadn't realized that she had recently begun crocheting baby blankets again -- one for her new grandchild. It was a lot of fun learning that we shared this connection even though we live so far apart.

Friday, April 25, 2014

Steady Progress

The end of the school year always means a lot of grading for a college professor, so as you can imagine, yarn work has had to take a bit of a back seat lately. However, I have made steady progress on a couple of items I have introduced here before.

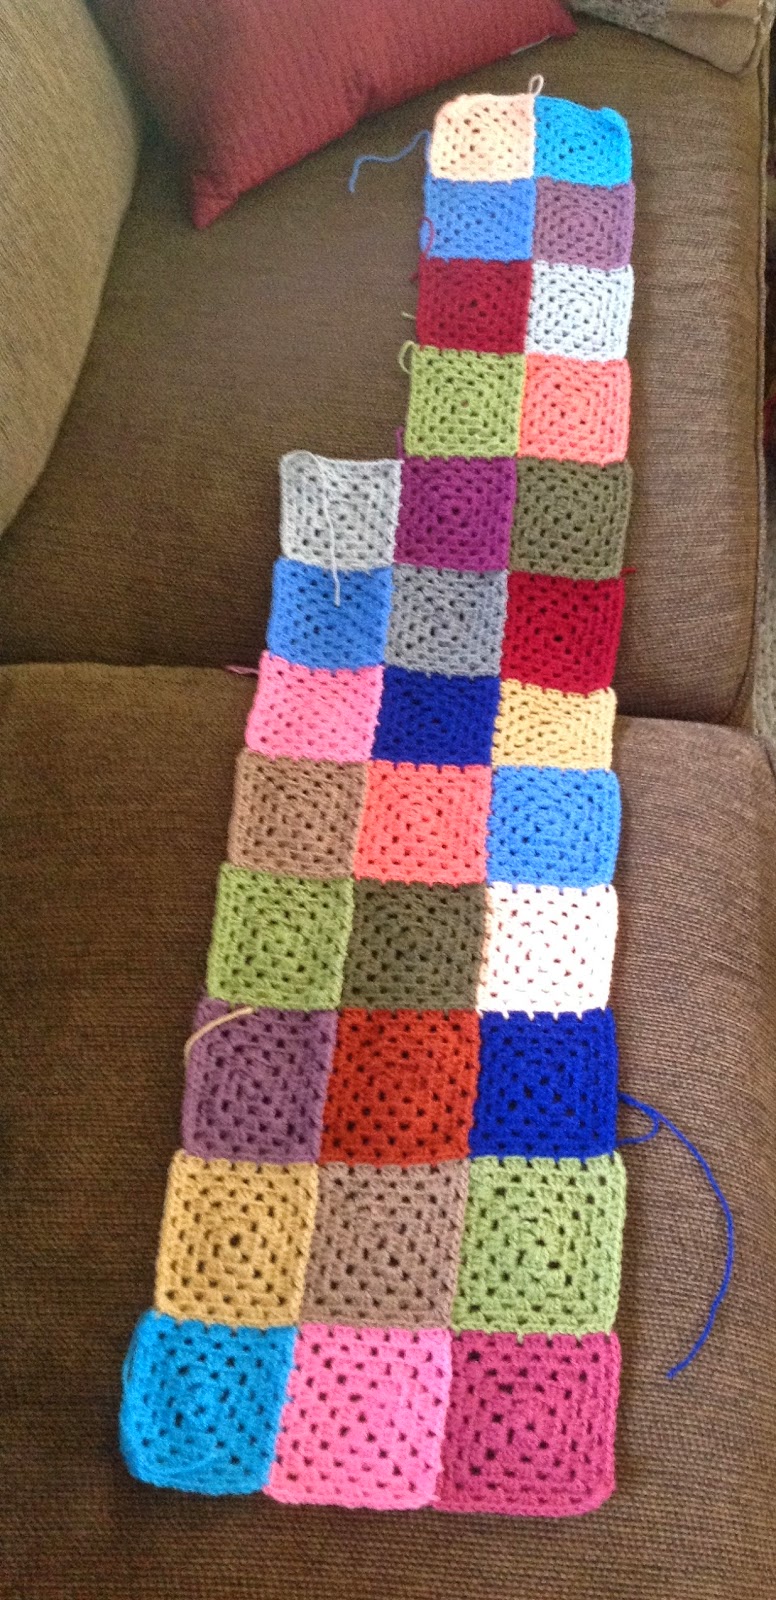
I am finding that the Granny Patchwork Blanket is very nice to pick up on evenings when I am tired and unable to think too deeply about fiber arts. Each square is made in exactly the same manner. I have also decided to plan each row of squares in advance (as Lucy on Attic24 did) since it makes the project more portable. I am really started to get excited about how well the colors are coming together. Lucy talks about "soul" colors as I have mentioned before, and these are definitely mine. They make me feel warm and fuzzy inside when I see them.


The picture below shows all of the squares.


On the knitting front, I have mostly been working on the sweater I am designing for myself. This process is so much fun, and I wonder why I waited so long to try it! If any of you are considering designing your own garment, just jump into it. Really, what is the worst that can happen; it is just yarn. Here is the back piece:


As you can probably tell, this will definitely need to be blocked, and once it is, the lace will open up quite a bit in the central motif. One element of this design that I am so pleased by is that I was able to get the honeycomb stitch into it in a way that did not simply mimic the traditional Aran look. I wanted a touch of Aran but with the twist of a lace motif that resembles cabling. 

I have started the front pieces and hope to keep chugging along on this sweater until it is finished. Usually, I tend to knit many different things at once without sticking to any one project for any length of time. I guess you would call me a process knitter since I am never too concerned about how long it takes me to finish something unless I am knitting a gift or test knitting for a designer. However, this time, I really want to finish this project as soon as I can just to see how it all turns out. I also need to calm those negative voices inside of me that keep telling me "it might be too small" or "the color isn't going to look right on you." I know that once it is finished and blocked, everything will work out. Once it is completed, I will write a longer post on my design process and about all of the helpful resources I used to make it happen. It really has been a simple process and one that I am enjoying.


Friday, April 11, 2014

Join As You Go (JAYG) - A Miracle Technique for Crocheting Granny Squares

I can't express strongly enough how enamored I am with the JAYG (join as you go) technique that I recently learned to use while working granny squares. As I mentioned on this blog in another post, I have known about this technique's existence for a little while, but I had never tried it out before. I hadn't seen any directions for it and hadn't taken the time to search for them, but then I came across Attic24 (my go-to blog for anything crochet-related) and saw Lucy's wonderful tutorial for the technique. Since that time, I have also watched a you-tube video about it and have read Edie Echman's book, Connecting the Shapes Crochet Motifs. This technique has really changed everything for me when it comes to crochet because I am now really enjoying making granny squares, knowing that I will not face an endless amount of joining when I finish piles of squares.

Here is a brief explanation of how I am joining my squares as I go (note that my method is slightly different from the explanation in the link to the first tutorial above but is the same as the method used by Lucy in the second tutorial; both get very similar results):

  • For the first row, I completed a five-round granny square and then chose a coordinating color for my second square.
  • I completed four rounds of the second square, and then I completed the first edge of the the fifth round, while only completing the first three-dc cluster of the corner. (I begin the rounds by chaining 3 after I slip stitch into the top of the chain 3 from the round below. This makes my first dc. I then dc directly in to the space at the right edge of the corner, which does slightly twist the stitch. Finally, I complete the 3 dc cluster, which is only half of the corner. Then when I come around the to that corner again, I complete it with 3 dc, chain 2, and a slip-stitch join to the original chain 3 I made to begin the round. The slight twist of the first chain 3 stitch does not show at all once the round is completed.)
  • I, then, slip stitched into the corner of the first square I had completed, connecting the top left corner of the second square to the top right corner of the first square.
  • After I slip stitched the two corners together, I then completed my second 3 dc cluster to complete the corner. 
  • From this point on, the JAYG technique continues with slip stitches into spaces on the completed square to connect the sides of the two squares and 3 dc clusters into spaces on the square being worked to create the last round of that square.
  • When I got to the second row, I began the task of not only joining the adjacent sides of squares, but also of joining the bottoms of the squares in the row being worked to the tops of the squares in the row below. This means that you must slip stitch in two places at the corners, once into the corner of the square that is adjacent to the square upon which you are working and once into the corner of the square below the one upon which you are working. After these two slip stitches are completed, you begin to make the 3 dc clusters into the bottom edge of the square upon which you are working, slip stitching into the spaces of the square below the one upon which you are working as you go along.
Here is what it all looks like put together.


This next photo illustrates a square in progress that will be attached soon.


This photo illustrates the slip-stitch joins, circled in red, and gives an idea of placement. 


The most helpful tip I learned when studying this technique was to think of the slip stitches as the equivalent of the chain 2 that is done between the 3 dc clusters at the corners and the equivalent of the chain 1 (that is sometimes done) between 3 dc clusters along the sides. (I want to note here that I am not chaining between my 3 dc clusters along the sides in order to make my granny square more compact - a tip I learned from Lucy on Attic24).

As for choosing my colors as I join squares, I am currently flying by the seat of my pants and just choosing them as I go. I like this method since so much of my life is planned; I find it to be fun to have freedom in my crafting at times and to just try to go with the flow of my inspiration at the moment in choosing the colors. Since this is supposed to be a "patchwork" blanket, I have faith that this spontaneous method will work out in the long-run just as it did when I made the Granny Stripe Blanket. However, I reserve the right to change my mind after this second row if I find that I am not pleased with the effect. If that happens, I will follow Lucy's method of choosing colors a row at at time.

Please share your experiences with JAYG in the comments, or if you have another method of joining that really works for you, we would love to hear about it.

Saturday, March 29, 2014

Yarn Likes to Be Washed!

In my knitting, I have always been a big fan of blocking finished objects. Wool likes to get wet, and gently blocking knitted items evens everything out and often eliminates minor imperfections. Issues with size can also be adjusted during the blocking process as long as the measurement differences aren't too large.

However, I didn't realize until this morning how much of a difference washing a crocheted afghan could make. I am so pleased with the result I achieved by washing my acrylic Granny Stripe Blanket on cold, delicate cycle and then drying it on low (as the yarn band instructed). Not only is the afghan a lot softer and fluffier, but the drape of the afghan has really improved. It used to feel a bit stiff, but now it is light and airy. 

But the absolute best improvement of all is that now my corners are not curling!! It appears that the stitches I added in the corners (as I describe in this post) actually worked to make the corners lay flat. I am so pleased. I am not adding a picture of the afghan here because a photo doesn't capture the improvement. It is all in the feel of the yarn and in the feel of the drape of the afghan, something that can't be shown well in pictures. 

Does anyone have any other tips about finishing crocheted items that help to improve upon the finished object? Please share in the comments if you do.

Friday, March 28, 2014

Finished! Cozy Granny Stripe Blanket for the Whole Family to Enjoy

I put the finishing touches on my Granny Stripe Blanket this week, and I am very pleased with it. I decided to stick with Lucy's suggestion for the edging. I followed her directions closely, but I neglected to look at her photos as closely before completing several rounds. As a result, my corners aren't worked as well as hers were. I accounted for the need to add stitches to my corners by chaining three stitches at each corner the first time around. I then chained two stitches at the corner after a couple of rounds of not adding stitches when I noticed that my corners were curling in a bit. Even with those adjustments, my corners still curl in a bit if I don't straighten them. 

Of course, I noticed when it was too late that Lucy seemed to work her corners a little differently. If I make one of these blankets again, I will study her photos a little more closely to see what she might have done to prevent curling. I will also read Eddie Eckman's advice on corners in her book on borders that I mentioned earlier in the week. Why I didn't do that before I started my edging is beyond anyone's comprehension. As my mother always said, "haste makes waste." 

With all that being said, I am very happy with my finished afghan, especially since this is the first large afghan I have completed in at least six or seven years. It is nice to have a new one around the house. Here it is:


I made the blanket to put in our back sunroom, which has a blue, red, and tan color scheme, but I am finding that it actually looks good in just about any room in my house since there are so many colors in it. Here is what it looks like in the blue and red room:


Here it is all folded up nicely and neatly (something that will probably never be seen again in a house like mine with two teenagers).


Lastly, here is clos -up of the edging. I love the way Lucy's mind works. This edging was simple to crochet, yet it adds a touch of loveliness that really completes this afghan beautifully.


To recap the specifics about this afghan, it is the Granny Stripe Blanket by Lucy from Attic24.  I used various colors from Vanna's Choice yarn (details to follow on my Ravelry project page under suzknittyspinner). My color selection was random throughout the crocheting of the project. Measurements for the blanket will also be put on Ravelry when I get around to listing all of the colors I used there later this weekend.

I mentioned my great grandmother, Mum Jo, on the blog when I first started it, but I wanted to pay tribute to her again now that I have completed another afghan. She is definitely my inspiration for making these blankets since I vividly remember how she used to make so many crocheted afghans for her family members throughout her later years (she spent the earlier years crocheting exquisite dollies and table clothes) and how much these blankets were loved by all. She was the matriarch of a large family with nine grandchildren and upwards of 30 great grandchildren, and she was continually making afghans for each one she could before she could no longer crochet because of her advanced age. I feel very lucky to have been one of the older great grandchildren who received one of her afghans. I have it to this day, and I cherish it. I can only hope that one of my family members will cherish my afghans as much as I do hers. And maybe if I am really lucky, one of my descendants will also cherish the fiber arts as much as I do and learn from me so they can carry on as I have carried on Mum Jo's legacy.

So what I am up to now that I have a little more time to get back to focusing on my knitting? I am slowly making progress on my husband's Kearsarge sweater, knitting another chemo cap, knitting the lace socks I posted about last week, and trying to design my own cardigan. I will update you more on these projects in upcoming weeks.

(Just an additional note -- I guess I really do have ADD when it comes to fiber arts since I forgot to mention one other project I have been steadily making progress on, the Ivy League Vest. I will be casting on for the steeks soon, so I will update everyone on that with another "Adventures in Fair Isle" post soon.)

Sunday, March 23, 2014

Putting the Finishing Touches on My Granny Stripe Blanket

Thanks to Lucy at Attic24, I have gotten back into crochet after many years where I only crocheted infrequently when needing to make a baby afghan. Crochet was my first fiber passion, and I am having so much fun bringing it back into my regular nightly fiber fun. I enjoy having several fiber crafts from which to choose (knitting, spinning, and crochet right now but weaving on a rigid heddle loom keeps calling my name). 

After a couple of months of work on my Granny Stripe Blanket, I am beginning to see the end of the road for it. It has been a very enjoyable process since the stitching is very simple and meditative, yet the color changes have provided a lot of excitement.  Here it is with all but the edging to complete:


I have begun the edging following Lucy's instructions to complete a 3 dc cluster in each space along the edge using the purple yarn in the photo above. I then plan to continue to follow her instructions using the green, the pink, and then finishing with the blue at the outer edge. I might throw in one more color between the green and the pink if I think I need it. 

Right now I am having to deal with all of the ends that changing colors so frequently produces. This was the part I have always dreaded about color changing in crochet and knitting. However, I am finding that if I just buckle down and bite the bullet, it isn't too bad. The pictures below show the edging and the way that I first crochet over the two ends left for each color change row. You can see in the second photo that even after I crochet over them, there are still ends that I need to weave in a bit more with a tapestry needle since crocheting over them with only three dc doesn't seem secure enough to me. I would rather take the time to secure them now than regret it later if the blanket begins to unravel.

The 3 dc edging on the first round


I am so happy with every aspect of this project so far. It has been a joy to crochet and the Vanna's Choice yarn was nice to work with for this project. As you probably know from reading this blog, I am primarily a wool kind of gal. I love everything about wool from spinning it to knitting with it. However, for crochet, I have always found acrylic to work just fine. It is more cost effective when making a large afghan, it is easier to wash and dry, and a wide range of colors is usually easy to find. 

Has anyone made the switch from acrylic to wool in his or her crocheting? If so, could you add your reasons in the comment section below. I would love to hear about the differences you have found in using wool for crochet if you have decided you like it better. I just may try it soon as long as I can do so without completely blowing the budget! I think I see a crocheted shawl or scarf made in wool in my future.


Friday, March 7, 2014

Join As You Go (JAYG) - Crochet Granny Squares

I have been crocheting for over 20 years, yet I have never successfully completed a granny square afghan. There are a number of reasons for this:

  1. Knitting took over as my passion a year after I began crocheting, so most of my attention has been devoted to mastering the many aspects of knitting that I have caught my interest over the years.
  2. When I learned crochet, I became very attracted to stitch patterns (as I did for knitting) and spent a lot of time practicing different types to determine which ones I would use for various afghans I had planned. I ended up making three different afghans using three different stitch patterns (five-dc shell, front-post/back-post basketweave, and a combination cluster st/5 dc shell) in my early days of crochet. Recently, I became drawn back into crochet because of Lucy's fabulous Granny Stripe Blanket, another one worked in rows, as I have always done, but this time using color.
  3. Lastly, the idea of joining the squares has always been something that has been a turn-off! I have made squares for afghans worked with co-workers for charity before and have even participated in joining portions of those afghans, but I have never liked the joining process. I have begun at least two granny square afghans of my own and the completed squares have sat in baskets and trunks for years since I have never been motivated to join them. 
Of all the reasons listed above, I have to say that I suspect #3 is the real culprit. Luckily, I have recently come across a technique that eliminates #3 from the list - JAYG (join as you go). I had heard of this technique before, but I had never taken the time to practice it. Then I saw that Lucy from Attic24 was using the technique in some of her blankets and that she even had a tutorial for it. I had to try it, so I did. Here is the Granny Patchwork Blanket that I started the other day using the JAYG technique.


I am using the slip-stitch method that Lucy uses, but there are two other methods described in Edie Eckman's Connecting the Shapes Crochet Motifs book in case you are interested (flat joins and single crochet joins). I am very happy with this technique so far. It is very easy to execute once you learn how to do it, and I enjoy watching the blanket grow as I am working. I think that might be one of the reasons I always liked making my afghans in rows. I love to see knitting and crochet grow. This might be what makes me more of a sweater knitter and a blanket crocheter than someone who enjoys making small items. I am also a person who is cold all of the time, so there is a certain appeal to working on an item that serves the dual purpose of being interesting while keeping me warm. 

Here is a closer picture of the slip-stitch, JAYG seams (to view a tutorial click on this link from Attic24):


I have become so enamored with this new project that I just had to have it with me (along with at least two other knitting projects) for my brief trip to Florida in the next couple of days. I couldn’t decide which colors to bring, so I cam up with the idea to wind small balls of each color (all 17) and to bring them with me in my luggage. Stitching squares by the pool seems like fun. 

Look at all of the beautiful colors; I have become quite fond of Stylecraft Special DK (recommended by Lucy of Attic24) for acrylic. I am normally a wool-kind-of-gal, but for an enormous crochet afghan that will hog a lot of yarn and need to be washed frequently, you can’t beat a nice acrylic. This one is particularly soft, which is a bonus.


Have any of you tried JAYG? I would love to hear some of your experiences or any suggestions for other methods that you use to make joining motifs fun. 

Thursday, February 13, 2014

Adventures with Fair Isle - Follow-up

I was thinking about the post I wrote a few days ago with information about all of the sources upon which I drew to help me learn Fair Isle, and I realized that I left out a few. Recently, I found a great blog that inspired me to try Fair Isle again since the writer had knitted some glorious sweaters and had also taken the time to share her knowledge with others. The blog is called By Gum, By Golly, and the writer, Tasha, is an incredibly skilled knitter and seamstress. She loves vintage clothing, so her Fair Isle work is inspired by vintage Fair Isle patterns. I found her tutorial on stranded knitting incredibly helpful since she focuses on several aspects about which most beginners wonder:


  • How to hold the yarn using various techniques, depending on which suits the knitter best (I especially like that she admitted to dropping yarns, being careful not to let them twist, when she first began stranding. She asserts that this is actually a valid technique and that if one is comfortable using it, they should continue to do so. I have actually heard of prolific Fair Isle knitters using this technique, so it was nice to see it validated. As an FYI, I actually use the two-handed technique just because this is how I began.)
  • How to strand the yarn to avoid "puckers" and to produce "even stranding" (more on this below)
  • How to choose colors for vintage patterns
Tasha's writing on this subject has been especially helpful to me in calming me down a little bit about my worries that my stranding might be too tight (yes, I tend to be a perfectionist, but I always call myself the perfectionist who can never get anything perfect :) ). I can clearly see that my stranding on the wrong side looks very even and is not tight in any way, yet the front side still looks a bit uneven. Here is a photo of the wrong side to show the stranding:


It looks pretty even to me, and I even see a few spots where the floats actually look a little bit loose. That doesn't concern me, though, because Elizabeth Zimmerman always says in her videos "better too loose than too tight" because you can "snug up" loose floats. Please feel free to share your opinion if you see something here that indicates it might be too tight. Now here is the front.


I am fairly happy with it, but I keep having sneaking concerns that it might be a bit puckery. Here is where Tasha's By Bum, By Golly blog really helps quiet my inner-critic; she shared a post of the before- blocking and after-blocking photos, and the difference in evenness is distinct. Here is the link to the post: before and after blocking. This blog is the only place I have seen photographic evidence of the wonders of blocking on Fair Isle, so I am so grateful for Tasha for sharing. I am paying it forward by making you all aware of it, so hopefully I can help calm your own inner-critic.

Another source of constant help and inspiration to me has been WendyKnits. Wendy's writing on knitting has been so important to me for over 10 years, ever since I found her blog back in the very early days of blog writing. As you can see, she is very skilled at Fair Isle, and if you look at her archives, you will see that she has knitted many of the Alice Starmore Fair Isle designs. Her work is amazing! If you read the posts in the archives for some of her Alice Starmore designs (Mara comes to mind immediately), you will see that she talks about Fair Isle technique in many of them. 

Lastly, I just noticed that Spring edition of Interweave Knits has an article on Fair Isle knitting, and it seems to provide a lot of great information on it. I have yet to read it, but I am looking forward to a quiet evening without distraction to curl up and see what it has to offer.

As you can see from the scant progress made on the Ivy League Vest in the pictures above, I haven't had a lot of time lately to work on Fair Isle knitting since work has been busy, and family life has had me on the run. As a result, most nights I have needed something cozy yet simple to help me wind down from the day, which has allowed me to make significant progress on this glorious crocheted afghan by Lucy of Attic24, the Granny Stripe Blanket.


I am so grateful that I found Attic24 earlier this year since it has rekindled my love of crochet with the amazingly bright, adorable projects that Lucy shares with her followers. Being able to work on something colorful and warm in the evenings of this bitterly cold winter has been a blessing. Fair Isle also brings color to my life, but it isn't something I can do very easily in the evenings when I am tired since I am still too new to it for it to be mindless. Crochet, especially this type of repetitive, double crochet stitch, row-by-row crochet, really fills my need for color and mindlessness in the evenings. 

If any of you knitters have never tried crochet, I highly encourage you to do so. It is a lot of fun being "bi-crafty" (an expression I heard on one of the podcasts I listen to, but unfortunately I can't remember which one in order to give proper credit). I am loving crochet again so much that I have ordered a large quantity of Stylecraft Special DK (at Lucy's recommendation) on sale from Deramores so that I can begin another one of her afghan patterns as soon as I finish this one. I am considering either the Ripple Blanket or the Granny Patchwork Blanket. Crocheters out there, which one do you recommend more? They are both wonderful, so just let me know in the comments which one you like best if you have done them both or even if you are just looking at the pictures!

Happy knitting and crocheting, everyone!


Friday, February 7, 2014

Adventures with Fair Isle, Part III

I haven't disappeared in case anyone was wondering! Sorry to keep anyone who might be interested in reading more waiting, but it has been a busy week with work and the kids' schedules. I knew when I began this blog over vacation that it might be tricky keeping it going once work got busy again, but I am determined to hang in there. I am really having fun with this, and I hope those of you who are checking in from time to time are too. Please leave a comment to say hello or to add your two cents if you would like to do so. Just click on the area that currently says "no comments" and help me change that to "1 comment" or more. :)

So here is what I have been working on in the few spare minutes I have each evening -- something mindless and soothing: Granny Stripes from the delightful Lucy of the Attic24 blog.


We have been living through a very challenging winter here in Ohio, so I find the colors in this blanket to be soothing yet lively in contrast to the greys of winter. Lucy talks about "soul colors" on her blog, and anyone who knows her blog knows that her soul colors are deliciously bright and cheerful. My tastes run a little more to autumn colors, though, so this blanket provides me just enough pep to lighten my spirits yet make me feel at home.

Onto Fair Isle! I haven't been doing much of it this week since my mind hasn't been in shape in the evenings for any more challenges, but I have been thinking a lot about how I learned the little I do know. I want to share with all of you some of the wonderful sources of information that helped me to get to the point where I feel confident to try to knit a Fair Isle vest. Here are some of the books that have been my guide over the years:


Like many, my first introduction to Fair Isle techniques was Alice Starmore. Many years ago when I wanted to read about Fair Isle, her original book on the topic, Alice Starmore's Book of Fair Isle Knitting, was out of print and cost around $200 to buy on ebay. I couldn't begin to think about forking over that kind of cash for it, so I checked it out of the library and read and reread it, hating to part with it when it was due. Foolishly, I let an opportunity to buy this book at the regular price of $40 when I saw it in a knitting shop along side Alice Starmore's original Aran Knitting. I wanted both books very badly, but since Aran knitting is my first love and my true love, I decided I could only afford one of the two books -- it had to be Aran Knitting. I regretted not buying both within a week, went back to the shop to buy Fair Isle Knitting, only to find it had been sold that very morning to someone else. I will regret that mistake for the rest of my knitting life. I have since been able to buy the reprint of Alice Starmore's Book of Fair Isle Knitting much to my delight and as much as I love it, I still wish I had the beautiful, hard-cover original with the picture of Mara being knitted on the cover. 

I encourage anyone who is interested in Fair Isle to buy the reprint of this book immediately for the following reasons:
  • It provides an excellent historical account of Fair Isle and the island from which it developed.
  • It discusses patterns in detail, including how to choose them to create your own designs. It also includes many pattern motifs.
  • It provides an in-depth discussion of Fair Isle techniques such as stranding using the two-handed method that A.S. recommends and steeking. The illustrations used are excellent and easy to follow.
  • It provides an in-depth illustration of Alice Starmore's inspirations for her designs. 
  • It provides many patterns for sweaters and hats.
My second "bible" of Fair Isle knitting is Ann Feitelson's The Art of Fair Isle Knitting. I adore this book. In many ways it has been even more helpful to me than A.S.'s book. Feitelson does an excellent job of providing history and techniques, but she even goes one step further by providing in-depth explanations of color dominance (yarn dominance) in stranding. Before reading her book, I hadn't heard about the importance of consistently holding the background color of the pattern in one hand (usually the right hand when stranding with two hands) and holding the pattern color in the other hand (usually the left hand when stranding with two hands). After reading her book, I have a great understanding of how important it is to keep the background color strand running over top of the pattern color strand and the pattern color strand coming up from underneath the background color strand if one wants the pattern colors to stand out and wants the motifs to appear consistent. This tip alone (which she learned from speaking with Shetland knitters) makes this book worth its price in gold! Of course, Feitelson explains many other aspects of this craft brilliantly in her book and provides some great patterns. Here are some of the highlights:
  • History - great detail gained from her experience interviewing Shetland Isle knitters
  • Techniques - steeking, stranding, choosing colors, choosing patterns, and doing the math
  • Illustrations - helfpul, clear, and beautiful
The other two books I show above have been helpful to me, too. Stranded Color Knitting by Nanette Blanchard, seems to be out of print now, but I found it to be incredibly helpful since Nanette provides simple, clear instructions and illustrations of many of the techniques I learned in the previous two books I mentioned. I had followed Nanette on her former blog years ago where she provided many tips for Fair Isle knitting. You can still find some of her advice on the group pages for Stranded in Ravelry, but it appears that Nanette is no longer blogging. Lastly, Sheila McGregor's Traditional Fair Isle Knitting was one of the first well-known books written about Fair Isle. The motifs included in this book are very helpful to anyone who wants to create his or her own patterns.

Lastly, I must give a lot of credit to Eunny Jang! Her inspiring work on her former blog, See Eunny Knit, really got me interested in trying Fair Isle way back when. Her amazing instructions and illustrations in her Steeking Chronicles are still available for free online for anyone who wants to view them. I highly recommend them as I do her dvd, Introduction to Fair Isle: The Ivy League Vest. 

I must thank one more designer for her help to me in this process of learning Fair Isle, Beth Brown-Reinsel. For my fortieth birthday a few years back, my husband treated me to a two-day workshop with Beth focused on Fair Isle. She had us all make a small, teddy-bear-sized Fair Isle sweater with steeks to learn the entire process in a hands-on manner. It was the most wonderful birthday gift I have ever received! Unfortunately, I nearly lost my job, because the school at which I was teaching was closing, right after that and had to plunge full force into job-search mode and then become familiar with learning the ropes of a new college. Fortunately, I am very happy where I am now and I am blessed to have landed safely after nearly losing my teaching career. The knitting did take a backseat during those years, though, as it should have, so my inspiration to really master Fair Isle waned for a bit. I am now back on track and hope that all of this book-learnin' pays off soon! It is time to dive in and really make a go of it. We scholarly types can sometimes lose ourselves in reading and studying instead of doing, so now it is time for me to do. I recommend that you try some studying, though, if you are new to all of this since it is a whole lot of fun and time well spent. 


Friday, January 3, 2014

Getting Interested in Crochet Again

When I began this incredible fiber arts journey I have been taking over 20 years ago, it was crochet that started it all. I had learned to crochet from my great grandmother, or as everyone called her, "Mum Jo." She was one in a line of talented stitchers, going back at least as far as her own mother. I am fortunate to have a few of their works in my possession, including crocheted afghans, dollies, table clothes, and a piece of knitted garter stitch cloth. Mum Jo's daughter, my grandmother, was also a very talented seamstress.

Given how much the needle arts was a part of the lives of the women in my ancestry, it is surprising how little of a role they played in my childhood. I learned latch-hook rug making as many kids do (but never finished a project), learned to sew a button from my grandmother, and later took a sewing class. None of these pursuits really made much impact on my day-to-day life as a child, though. In fact, I remember reading, drawing, and swimming being my primary interests. Luckily, though, Mum Jo took me aside one summer day when I was visiting her and introduced me to crochet. She gave me some homely tan, acrylic yarn and a crochet hook. She taught me to make a foundation chain and to single crochet. She may have taught me double crochet, too, but I can't remember that. All I know is that I worked on a single crochet ripple "afghan" for awhile, but only ended up with less than five inches completed. It then sat in my closet on a shelf for over 10 years.

Every time I would go home to visit my parents, I would peek into my old closet and see that crochet. I often regretted giving it up and wondered if I could start again, but by that time, Mum Jo was in her 90s and had given up crochet long ago. I didn't know who to ask for help, yet the crochet kept calling me. Finally, during a visit home in my early 20s, I decided to bring the crochet back with me and to ask a colleague to help me get started again. She was a talented quilter, but I knew she also crocheted a bit. She got me going on single crochet again, and then I bought a pamphlet from a craft store to learn the rest. I caught on quickly, and before I knew it, I was hooked!  Many late nights were spent pondering over stitch patterns, planning afghans, and finally crocheting them. Not long after that, a friend introduced me to knitting, and eventually when I got the hang of it, my crochet took a far back seat. However, I always enjoyed it, and lately it has been calling to me again -- mostly due to a blog I found that really inspired me: Attic24. Lucy's glorious colors and inviting afghans caught my attention and have held my attention for awhile now. Lately, I decided to begin one of her Granny Stripe Blankets, using an assortment of Vanna's Choice colors that I had accumulated for an abandoned granny square afghan. I am so pleased with the way this afghan is taking shape and am enjoying choosing the color combinations very much. Here is the work in progress:


And a close up to illustrate the color combinations:


My plan is to edge the afghan in a way that predominately highlights the blue since the room I am making it for is decorated with blue accents. We have a red trunk/coffee table in the room, too, hence the red stripe running through the afghan every so often. The couch is a tan color, which ties in well with  the earth tones in the blanket. This project has brought me more confidence in my sense of color and has inspired me to look at ways of using color combining more in both my knitting and crochet.

After being bitten by the crochet bug again, I decided to whip up a quick hat as a Christmas gift for my neighbor's new baby girl. They had generously brought us homemade pumpkin roll for the holidays, and not being a baker myself, I had been wondering how I could return the gesture. Crocheting an adorable hat seemed like just the thing!


If any of you have thought about trying crochet, I encourage it since it compliments knitting well. From a practical standpoint, crochet can be used to make a great provisional cast-on or to secure steeks in stranded knitting. It can also be used to make practical or pretty edges. I have also found that there are times when taking a break from one repetitive motion to work in a completely different repetitive mode really helps me to prevent the onset of tendonitis. This is especially true since I predominately knit using English style (right-hand yarn hold) and crochet in the traditional left-hand yarn-hold manner. Even though, I sometimes switch to Continental Style knitting (left-hand yarn hold) to relieve repetitive stress, crochet feels even more natural to me and is, therefore, great for mindless stitching in the evenings. I have gotten more proficient at Continental style knitting through practice, but it is nowhere near as effortless for me as English style knitting or crocheting is, having done both of these needle work techniques for over 20 years.

Knitting will always be my greatest passion, but it is fun having other fiber arts calling my name, and crochet is definitely one that will steal my attention from time to time!


Sunday, December 29, 2013

Everything Old Becomes New Again: Infinity Scarf, aka E. Z.'s Moebius Ring

Recently, my daughter asked me to knit her an "infinity scarf." I was delighted since she rarely wants hand knits from me, but I wasn't sure what she meant. I asked her to show it to me, and when she brought up an image on her computer, I recognized it instantly as Elizabeth Zimmerman's Moebius Ring from her beloved book Knitting Around. This book has been a favorite of mine for a long time, and I have often admired the Moebius Ring. I was thrilled that she wanted one. Since she wanted black garter stitch, and I had some black Berrocco Ultra Alpaca left over from another FO, I casted on immediately. Here it is:


I enjoyed knitting mindless garter stitch more than I imagined I would. It made for a great carry-around project. I also invested in some Addi Turbos for the first time; boy did those needles fly! I loved that. I still like my Clover Bamboo needles for some projects and my Lantern Moon Ebony dpns for larger gauge socks, but the Addi Turbos sure have their place in my heart now, too.

I wanted to especially thank the Techknitter from the Techknitting blog. for saving me when it came to this project since I forgot to begin my garter-stitch rows with a slip stitch even though I have known to do that for years. Somehow it slipped my mind, making the edge look very uneven. However, when reading the Techknitter's blog, I saw a post about adding a crochet slip-stitch edging to garter stitch, so I did so on this scarf. It worked like a charm and was a fun way to end the project since I enjoy crochet so much. I highly recommend it: Here is a photo of how the edge looks:


The technique of adding a slip-stitch crochet edge is very simple, especially if you know how to crochet. I found it to be a pleasant was to end my work on this project.